How to Run and Install AI Locally
Instructions for installing and running AI locally so that all files and information remain on a local server and do not have be be shared with third party servers.
Travis Stephens
7/11/2025
This setup allows an AI server to be ran within the Windows environment on a local machine. A similar approach can be used to set up Ollama on a dedicated Linux server, however that is outside of the scope of this article.
Setup Windows System to Run WSL2
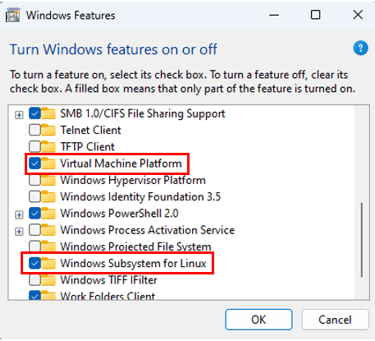
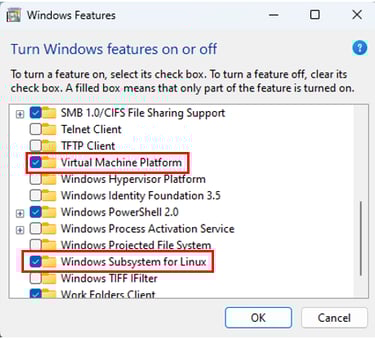
Navigate to ‘Windows Features’ by searching for it in the search bar
Enable ‘Virtual Machine Platform’ and ‘Windows Subsystem for Linux’
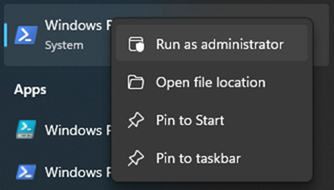
Launch ‘Windows Power Shell’ with administrator rights.

In ‘Power Shell’ enter command: wsl -install
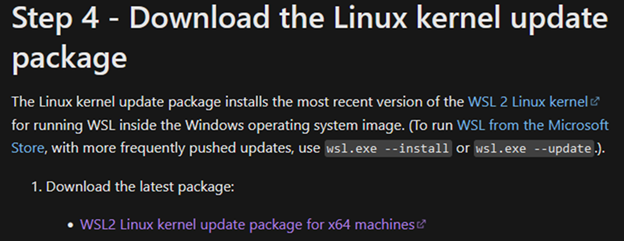
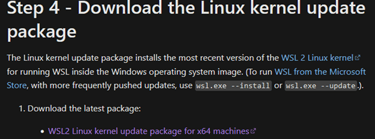
Download and installed ‘WSL2 Linux kernel update package for x64 machines’ from Microsoft’s website: https://learn.microsoft.com/en-us/windows/wsl/install-manual#step-4---download-the-linux-kernel-update-package
Set WSL2 as the default version by entering the following command in ‘Power Shell’: wsl --set-default-version 2
Install a Linux Distribution
In ‘Power Shell’ (with admin rights), download and install ‘Ubuntu’ using the following command: wsl --install -d Ubuntu
Within ‘Power Shell’ it will launch Ubuntu for the first time and prompt you to create a user. This step must be completed. If the new user step fails in PowerShell or PowerShell is closed before creating a new user, the new user will have to be created the first time Ubuntu is opened. Ubuntu will probably hang on ‘Installing, this may take a few minutes…’ If it does, hit ‘Ctrl + c’ and the prompt to create a new user should then appear.
Close PowerShell and Launch Ubuntu from start menu.
Install Ollama (local AI server)
In Ubuntu, while logged into the local admin account created earlier
Update packages: sudo apt update
Apply updates: sudo apt upgrade -y
Install ollama using the following command: curl -fsSL https://ollama.com/install.sh | sh
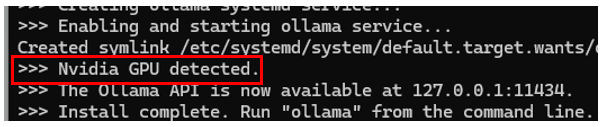
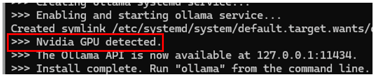
Check that the installation detected an Nvidia GPU (obviously one needs to be installed). If a Nvidia GPU is not detected Linux Nvidia drivers will need to be installed in the local account (not windows desktop drivers).
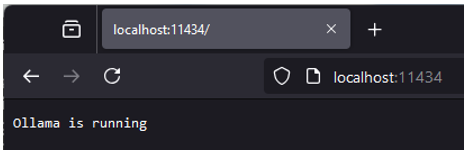
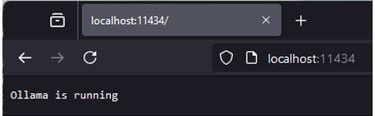
Once complete, the ollama server should be running in the background of the local account. To check the server is running, open a web browser (in Windows) and go to the address: localhost:11434. A string should be displayed stating “Ollama is running”
Installation and Running an Ollama Model
In Ubuntu, while logged into the local admin account created earlier and with the ollama service running:
Install a model by entering command: ollama pull llama3.1:latest
The ‘llama3.1:latest’ portion of the command selects to model to download and install. Other models can be downloaded and install the same way. The list of available models is found at: https://ollama.com/search
To view all models that are current installed enter command: ollama list
The llava (ollama pull llava:latest) model can analyze pictures
To remove a model enter: ollama rm llama3.1
Run a model by entering: ollama run llama3.1:latest
To exit out of a model type: /bye
Installing Open WebUI
Ollama and its models are fully functional inside of the Linux command prompt, but not the most user friendly. Open WebUI allows a chatGPT style interface to be used along with Ollama and its models.
Open WebUI can be ran inside of a Docker Container or locally. Instructions for installing and running Open WebUI locally may be added later. To installed Open WebUI in a Docker Container:
Install Docker using the following commands:
sudo apt-get update
sudo apt-get install ca-certificates curl
sudo install -m 0755 -d /etc/apt/keyrings
sudo curl -fsSL https://download.docker.com/linux/ubuntu/gpg -o /etc/apt/keyrings/docker.asc
sudo chmod a+r /etc/apt/keyrings/docker.asc
echo \
"deb [arch=$(dpkg --print-architecture) signed-by=/etc/apt/keyrings/docker.asc] https://download.docker.com/linux/ubuntu \
$(. /etc/os-release && echo "$VERSION_CODENAME") stable" | \
sudo tee /etc/apt/sources.list.d/docker.list > /dev/null
sudo apt-get update
sudo apt-get install docker-ce docker-ce-cli containerd.io docker-buildx-plugin docker-compose-plugin
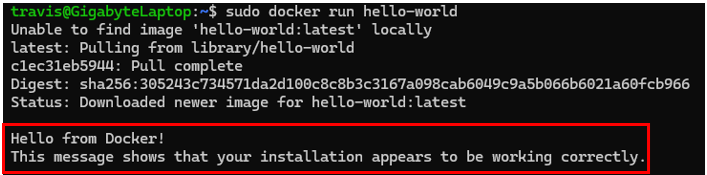
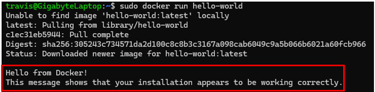
Check docker is running using the following command: sudo docker run hello-world
The ‘hello-world’ script with show the following message is docker is running


Deploy the Open WebUI container using the following command: sudo docker run -d --network=host -v open-webui:/app/backend/data -e OLLAMA_BASE_URL=http://127.0.0.1:11434 --name open-webui --restart always ghcr.io/open-webui/open-webui:main
Verify the Docker Container is running by entering command: sudo docker ps
Launch a Windows Web Browser and go to the following address: localhost:8080
This is how Open WebUI is run. The Ubuntu window must be open (running) with the Docker Container running. The Docker Container will be running each time the local Linux account is logged into.
Create an Open WebUI account or login. This step appears to only need to be completed the first time you launch it. An internet connect is required for everything to initialize, but once initialized, everything appears to work correctly while offline. The account credentials appear to be stored locally. The first account you login with is automatically the admin account.
Running Open WebUI
Once Ollama and Open WebUI have been installed, the next time you want to run Open WebUI, simply open Ubuntu and login (if required) to the account where Ollama and the container were installed. The docker container will be running while Ubuntu is open. Open a web browser and navigate to the localhost address (localhost:8080).
Here end the set of instructions for installing and running a local AI along with Open WebUI. The remainder of this article includes a handful tips for working with Open WebUI and Ubuntu.
To Update Open WebUI
Stop and remove the current container with the following command: sudo docker rm -f open-webui
Redeploy the container using the original deployment command: sudo docker run -d --network=host -v open-webui:/app/backend/data -e OLLAMA_BASE_URL=http://127.0.0.1:11434 --name open-webui --restart always ghcr.io/open-webui/open-webui:main
NOTE: the updated Open WebUI image may need to be pulled before redeploying the container. The image is pulled using the following command: sudo docker pull ghcr.io/open-webui/open-webui:main
To View Knowledge Base Documents in Docker Container
Find the ID of the Docker Container using: sudo docker ps
Bring up a shell command prompt inside of the container using: sudo docker exec -it <CONTAINER ID> /bin/bash, where <CONTAINER ID> is the ID of the container found in step 1.
The data is stored in the “uploads” directory of the “data” directory: cd data/uploads
Use “ls” command to view files in the now active directory
Use the “Reset Upload Directory” in the admin settings to delete ALL files in the upload directory.
To Remove Ollama and Open WebUI by Completely Resetting your Linux Environment
CAUTION!!! This completely clears your Linux environment and all data stored within it. Any information or data created in Ollama/Open WebUI will be lost, and Ollama and Open WebUI will need to be reinstalled along with creating a new Linux admin account.
Run command prompt (cmd) as administrator (from Windows)
wsl --shutdown
wslconfig /unregister Ubuntu
wsl --install --distribution Ubuntu
Insights
Delivering FAA compliant solutions and taking your team to the next level.
CONTACT
For Services Inquiries
higheraviation@gmail.com
618-713-7890
© 2025 Benny Aero LLC. All rights reserved.